Friday, July 13, 2012

Rain Eludes Bangalore

As rain gods continue to elude Bangalore, I am trying to think of something apt for this weather.
Its not unbearably hot here (as I type this I am being frozen to perfection by our Office AC , but it is pretty warm outside, though wouldn't come close to what we have in Kerala), nor is it humid, nor is it too cold (its a mix n match weather)-- kind of weird is what it is, but I am not complaining!!!
So this out of season weather calls for some out of season delicacy ... and my pick is Nan Khatai (I have no idea what is the relation between NanKhatai's and weather, i think this AC is working up to my brain now and I'm blabbing )
My friend in office recently professed his love for this Indian biscuit/cookie and embarked on a trip down memory lane , how they used to get them from road side vendors who carried it in big Glass dubbas over their head and sold them from street to street.
Apparently they were the best...hmmmm now since I did not have any such fond memories(tastes) either in my head or on my tongue I realised the time was ripe to make one of these at home and maybe these guys could tell me if they taste like they are supposed to!!!

So that sets the plan for this week..NanKhatai it is.......
I have been eyeing many recipes for this on various blogs and wanted to try out the original one before I embark on any of the modern(read healthy) deviations...
Armed with one such recipe, I go forth.

Monday, July 2, 2012

Indian Strawberry Cheesecake

I have drooled over cheesecake recipes and pictures on various Food channels and blogs, but without much hopes of ever getting to make one as they mostly call for cream cheese and other exotic stuff quite out of reach for me.
It was during one boring blog hunting session that I chanced upon Nandita's Blog and came across this recipe for an Indianised cheesecake.
It looked very simple to recreate and when we had a couple of friends over for dinner , I set out to make this (which feels kind of foolish on after thought as I should have first tested it out on my very own darling guinea pigs).
The fact that they asked for seconds was a saving grace.

I followed Nandita's recipe,except that I used fresh strawberries and did not get any blueberry jam to top it with.


Cheesecake standing tall!!!


Recipe Source: Saffron Trail

Keep a large strainer covered with a folded muslin cloth over a vessel. Once the yogurt is set well, turn in into the muslin covered strainer. Twist the muslin cloth and clip / tie it at the mouth. If the weather in your area is very hot, keep the strainer with yogurt over a vessel in the refrigerator for 5-6 hours until all the water (whey) is drained out. If you are not making the cheesecake immediately, store this thick block of curd in an airtight container in the refrigerator. Use within 24 hours so that it does not turn sour.
You can also use store bought yogurt like Nestle Dahi. You will need 2 tubs of 400 mg and one 200 mg tub to get a packed cup of hung yogurt.


Ingredients200 gm Parle G
3 tbsp melted butter 250 gm frozen strawberries (do not thaw) {I used 250 grams of Fresh one's}
1/2 cup sugar (add more if your strawberries are a tad sour, like mine were)

1 cup hung curd
1 cup cream

1 tbsp gelatin
4 tbsp water

2-3 tbsp Blueberry jam for topping (Coudnt get my hands on any then, have found them now, will try with this and post a pic)

Other equipment 

An 8-9" cake tin
Cling film
or
an 8" springform pan

Directions:
In a food processor, pulse the biscuits into coarse powder and mix in the melted butter well into it. (I powdered the biscuits in a ZipLock bag with a roller pin. Crushed it coarsely to my hearts content.)
Take a cake tin 8-9" diameter, line it with a large sheet of cling film big enough to cover the sides and come well out of the brim.(did not cover with cling film. We just cut the pieces directly out of the tin and served.)


Put in the biscuit-butter mix into the pan lined with film. Spread evenly and press well with heavy object such as mortar. Put in the freezer for 20 min or so to set.


Puree the strawberries and sugar together in a mixer to get a sorbet kind of mixture. Remove into a large bowl and keep aside.

Add the hung curd and cream, blend well to make a smooth mixture. Pour it into the bowl containing strawberry sorbet, mix them well with a wooden spoon.

Add 4 tbsp of water in the gelatin in a small heat resistant cup. Using a pair of tongs, hold the cup on the surface of water boiling in a pan. Stir the gelatin mix with a spoon continuously to get a clear liquid.

Pour the gelatin mix slowly into the strawberry mixture, stirring continuously.

Remove the set crust from the freezer and pour the strawberry mixture onto the set biscuit base.

Cover and put in the fridge to set overnight.

Drunk Chocolate Coffee Cake

This cake is born out of love of 2 things, Coffee and Chocolate!!!
No other way to describe this cake as it sits in a bath of coffee syrup and not so whipped cream!
It was nearly a disastrous adventure the baking of this , and though the end result was not bad, it taught me to go through the ingredients handy before starting a venture as risky as baking , where measurements and correct ingredients are the key to success (though we have all tweaked them here and there)....
I started making this cake with great gusto, sifted the flour added it to the wet ingrediants and was all but ready to put it in the oven when I realised that i was out of baking powder :(
There was no time to run out and get some and I was just plain frustrated with myself for forgetting it.
I bravely decided to go ahead with this as it was and was not entirely disapponited.
It was not the usual silky soft texture, was a little hard , even though I soaked it with more than usual coffee syrup.
Sprinkled some whipped cream and some pralines on top, and nobody was complaining.

Slurp

Friday, June 22, 2012

Eggless Coconut Macaroons

I never though that I would ever post or make a coconut dish coz I do not like them much.
Used to hate them when I was a kid  ,but now take a more tolerant approach to it because my husband has his taste buds rooted deep in our Gods own country and hence most of the curries he likes are coconut based (ehhhh!!!) .
People call me crazy being a Keralite and all and not liking coconuts?? that is difficult for them to digest ,just like the fact that I dont have fish or sea food , people just assume that we gorge on them because we are from coastal state. Friends give me a weird look, its as though evryone form Kerala must and should eat fish and love coconuts!! Else they are not fit to be called a Malayalee.
I would beg to differ, I may not eat or like them but at heart I am hardcore Mallu :) .....

So coming to the recipe, I came across this on one of my usual visits to Ria's blog and they instantly appealed to me.
Could be because recently a friend of ours had got these from a Kerala bakery, its very common there in all the local bakeries, and i surprisingly liked it.
With that taste on my tongue this recipe instantly beckoned me and I had to give it a try.
But there was a small hiccup, i did not want to use eggs and this recipe looked too easy to go searching for another egg-less one.
So with Ria's blessings I decided to use some condensed milk instead of the egg whites in mine.
And was I pleased with the result.
these macaroons are just like Ria promises , crispy and crunchy on the outside and nice and soft on the inside.
So what are you waiting for.......you are not getting anything simpler esp if you have access to dessicated coconut.
Dig in!!


Recipe Adapted from : Ria's Collection

Ingredients:
1 1/3 c dessicated/flaked unsweetened coconut
1/3 c sugar
2 tbsp flour
1/8 tsp salt
2-3 tsp MilkMaid/Condensed milk -- enough to bind the ingredients together
1/2 tsp vanilla

Method: Pre-heat the oven to 325F(170C - 180C) and line a baking sheet with parchment paper(don't get parchment paper here so didn't use that, just the baking paper).
In a small bowl, whisk together coconut, sugar,flour & salt. Add the milkmaid and vanilla to it and mix well. You will have a nice soft dough. Spoon them onto the baking sheet using a teaspoon and bake for 20 mins or until golden brown (I wanted little conical macaroons and hence the shape). Let them cool completely on a cooling rack and then ,store in airtight tins.
Copy cat that I am , I too tried the conical shape :).
Will try the flattened cookie types next.

There were more ,but by the time I grabbed the camera only these many were left :).


Thank you so much Ria for sharing such a wonderful recipe!!

Notes:
I did not have or coudnt find any dessicated coconut here, so I followed Ria's instructions in one of her comments.Scraped some fresh coconut and dried it in the oven at a low temperature, 160 degree C, for 15-20 minutes.
Take care that it doesnt change colour, it should only become dry not brown.
Mine didn't dry out much but I ran out of patience and used then anyways and they turned out just great!!!

Simple Veg Pulao ~~~ Quick and Easy Dinner for a Working Day

Back home after a long long day in Office and feel like having something tasty and nutritious but without any extra effort. No kneading atta, and rolling out chappathis and then breaking your head on what dish to pair it up with.
This is it. A substantial filling meal that dances on your taste buds and allows you to freshen up and relax while its cooking.
So simple to make and absolutely yummy.

Ingrediants:

Rice - 1C (I used normal sona masuri. can use Basmati as well)
Onion - 1 chopped finely
Garlic - 5-6 cloves (can use a Tsp of ginger-garlic paste instead . Easier!!!)
Green chillie - 2 chopped finely
Carrot - 1 small
Potatoe - 1/2
Corriander for garnishing
Cumin seeds - 1/4 tsp
Saunf Seeds - 1/4 tsp
Cinnamon - a very small piece (roughly 1/2" piece)
Bay Leaf - 1
Cloves - 1-2
Elaichi/Cardamom - 1
Oil - 2 tsp

Soak the rice for 1/2 hour before preparation.
Wash and keep aside.
In a pressure cooker add oil or Ghee for more flavour.
Splutter the cumin and saunf seeds, add bay leaf,cardomom and cloves and fry for a minute. Keep sharp watch as it will heat up quickly and burn.
One they are aromatic add the garlic and chillies and stir.
Add the onions and fry till golden brown.
Put the vegetables and fry for 2-3 minutes
Add the washed rice and fry for a minute or 2.
Add the appropriate amount of water (refer notes) and perssure cook.
Viola serve with a simple raita and some papads and we're done!!
For a lavish weekend meal pair it with some nice side dishes or curries.
These to follow soon!!!

Notes:

Sona Masuri needs twice the measure of rice + 1 cup of water - 4 whistles on high flame
Basmati rice needs 1 1/2 C of water for 1C rice -- 1 whistle on high flame
There are so many variations taht can be achieved with this, you can add sweet corn, capsicum,mushrooms, baby corns anything of your choice and customize!!!!

Veggie Pasta Bake

This one goes out to my lovely Friend A, who had asked for this recipe ages ago.
We started out as colleagues , I still remember when I first saw her I thought she was newly wed bride, with full Mehendi on both her arms and looking gorgeous as ever.
We bonded instantly and were in the same team for only a year sadly after which we were moved to different projects.
But we still  keep in touch and used to meet up over lunch or Breakfast at office.
Now we are in different locations so kep in touch via the phone or chat.
We met up recently and took the ride on Namma Metro :) ... We need to meet up again, its been a while now.
She is such a warm and loving person and makes friends very easily.

Moreover she is a wonderful cook. (One of these days will be knocking on your door with a pen and book in hand to jot them down)
We guessed that from the samples we had from her lunch box, but got the full blast of it when she invited a bunch of us to her home for an Iftar feast during the holy month of Ramzan.
And OMG what a spread she had for us.
It was difficult to believe that she had prepared all that while observing the fast.
I tasted my first faluda that day ....
Every dish was YUMMM...


So here goes the recipe:

Ingredients:
1 cup cooked pasta (I used spaghetti, cooked as per pack instructions with a pinch of salt and some pepper. Any pasta can be used)
1 onion - medium size
2 tomatoes
7-8 cloves of garlic
3-4 Green chillies (If you can take the heat, else reduce to 1-2)
1TBSP Butter
Salt to taste
3-4 tsp Oregano + little extra for seasoning while baking
2 tsp Chilli Flakes (Avoid if wary of heat)
4 cubes of Cheddar Cheese (40g) - Grated (I used Amul)

For the White Sauce:
The ratio of Plain Flour/Maida:Butter:Milk is 1:1:10
So if your taking one small measure of Flour take the same measure of butter and 10 times milk(can dilute the milk with water as well, i.e. 5 measure of water and 5 measure of milk).
I played around with the ratio for the right consistency and used
2 TBSP Butter
2 TBSP Flour
1C of Liquid (1/2 C of Milk and 1/2 C of water)


Preparation:

White sauce:
Heat the butter in a pan, once its melted add the Flour in small amounts and stir around till the raw smell goes (do not wait for it to brown).
Now add the milk little by little and keep stirring to avoid lumps.

Mix well on low heat and let it come to boil.
Once its nice and smooth, you can add 2 block of grated cheese (Optional) 
Mix it well turn off the heat and remove from the stove top.

Creating a rough Tomato sauce:

Saute the garlic and onions in 2 TSP of butter till they turn transparent (do not allow it brown)
Now add the chopped tomatoes and mix everything together.
Close the lid and let it simmer for 5-6 minutes till the tomatoes are nice and tender. Keep checking to avoid burning.
Once the tomatoes are done add the chili flakes and oregano. Salt to taste

Grease an oven proof dish (Used borosil) with some butter on all sides and the bottom.
Layer the tomato sauce first.
Place a portion of the cooked pasta.
Top with white sauce.
Repeat this till you've used up all the elements.
The top most layer should be the white sauce, enough to cover the pasta on all the corners.
Sprinkle 2-3 cubes of grated cheddar cheese if you wish

Bake in a pre - heated oven at 180 degrees for 15-20 minutes or till the top turns golden brown.

Veggie Pasta Bake

That's the cheese on the top as I felt lazy to grate it, I just tore it up to small bits and spread over the top.
I came across some Lasagna sheets recently during our monthly grocery shopping, cant wait to try it out .


Thursday, June 21, 2012

Gobi Manchurian ....M@nju Shtyle!!!

Gobi Manchurian:

Gobi Manchurian is in-arguably the most devoured dish in India (though it passes off as a Chinese dish , I seriously doubt if the Chinese even know of its existence.)
I am very much addicted to Food channels on TV and undoubtedly TLC was my favourite.
I love watching Nigella, Rachel Allen, Kylie Kwong and others preparing and presenting their dishes.
In all of Kylies shows that I have followed ,never once have I seen or heard her prepare anything manchurian (did I miss it , if anyone out there has please let me know).
But authentic chineese or not this dish has captured the heart of every Indian, and we were no exceptions.

Now Sundays are generally meant to be feasting days as its a holiday and as S assumes that I have rested enough on Saturdays(as if!! Is there any rest for a working mom of a 2 year old???  Not exactly but yeah i do manage to get my beauty sleep :D).
So on Sundays I usually prepare some Biryani/Fried rice and a curry to with it (If im up to it) .
After looking here and there and everywhere and not finding any recipe suited to our tastes(was looking for eggless, as I have seen many using egg whites) i dicided to do an experiment on my own after some basic lessons on it from some shows on TV.

Gobhi --- 1 . Cut into florets and cleaned. Keep the size small as its easier to handle and looks aesthetic
Onion -- 2 . finely chopped
Ginger/Garlic -- finely chopped/or paste (I prefer freshly chopped/ground than the packets) -- 5-6 tsp
I love garlic so i tend to go overboard with it .. you can use 2-3 tsp for a mild flavor.
Spring Onions  -- 1/2 bunch
Capsicum -- diced - 1 (i used a small one as I'm not a fan)
Soy Sauce -- 3 tsp
Green Chilly sause -- 2 tsp
Vinegar - 1 tsp (optional)
Tomato sauce - 2-3 tsp


For the Batter:
 1/4 C Maida  (I mostly use Besan/Kadala Maavu to avoid maida, it wont be as crisp but we don't mind)
2-3 tbsp Cornflour
2 tsp Chilly powder
1/2 tsp turmeric
salt according to taste
Water as needed

Chop the white and green part of the spring onion separately.
Mix all the ingrediants for the batter till there are no lumps and its a thick paste, which just coats the back of the spoon,
Dip the cauliflower florets in the batter and deep fry till golden brown. Keep aside.
In kadai (non-stick or otherwise) heat about 1 tbsp of oil.

Add the ginger garlic and spring onion whites, saute for one minute , do not brown.
Add the chopped onions and fry for 2-3 minutes on mediam flame, till they turn transparent and are just about to brown.
Stir in the capsicum pieces and saute for anthr 3 minutes.
I like to add half of the spring onion greens at this stage and reserve the other half for garnish.
Now time to add the sauces.
First reduce the flame to low (we dont want to burn the sauces do we).
Now in goes the soy, mix well.
Next comes the chilly, followed by the tomato sauce.
Mix everything together, taste and then add salt accordingly as soy is salty.
If you feel it needs a little more chilly kick feel free to add anthr tsp of it.
Keep tasting it and adjust the sauces to your taste.
Now if  you want a dry manchurian just put the fried floret at this stage and mix well till it coats the pieces.
Else mix 2tsp of cornflour in about 1/4 C of water and dissolve completely.
Add this to the kadai to form a semi gravy and let it come to a boil.
once its nice and thick (about 1-2 mins) we are done!
You can either add the fried florets now or only at serving time.

I prefer to add it now coz then it soaks the gravy up which makes it yum.
But it will make it a little soggy though so if your serving guests better mix just before serving.
And dont forget to garnish with the remaining spring onion greens!! 
Now this is an Indo-Chinese Twist..Or so I call it!
Njoi.

Microwave Carrot Cake

If I said this was the tastiest carrot cake I've ever had, i wouldn't be wrong (not only because this was my first ;)) , and that too in the microwave in just 12 minutes!!!! Can you beat that!
I tried this out during the winter when lovely fresh carrots were available.
Recipe adapted from Cooks.com
3 eggs  (I used only 2)
1 1/2 c. sugar
1 c. oil
1 tsp. vanilla extract
1 1/2 c. flour
3/4 tsp. salt
1 1/4 tsp. baking soda
2 1/2 tsp. cinnamon
1 tsp. cloves (I did not use this)
2 1/2 c. grated carrots (4-5)
3/4 c. chopped nuts  (I toasted the nuts for about a minute and half ,till they were golder before adding them. Oh BTW i used cashews. Used a mixture of cashews and raisins.)
close up view. you can see the lovely specks of carrot,raisins and nuts
In a large mixing bowl, combine eggs, sugar, oil and vanilla. Blend in flour, salt, baking soda, cinnamon and cloves. Fold in carrots and nuts. Pour into 12 cup microwave bundt pan. Microwave high (100%) 12 to 14 minutes, rotating 1/4 turn every four minutes. Rest 10 minutes.Loosen sides and center; invert on serving plate.
I server it as it is without any frosting.
If you live in a country with access to cream cheese you can try the frosting given in the site.

MW Carrot Cake

All in all it was a lovely cake and no-one can tell that it was baked in MW. The texture is just right and its carroty and nutty.
We didn't find the offensive eggy smell either , i think the Cinnamon did the trick, if I had added the cloves as well it would have given it a very nice christmassy feel, like the Christmas plum cakes.
This is just PERFECT with a nice hot cup of tea/coffee, curl up on the sofa with a nice book in hand...aaahhh life is good!

Next time will take decent blog worthy pics :).


Notes:
Since Cinnamon is not a commonly used spice in desserts at home so I did not have cinnamon powder handy.
I placed a 1/2" piece cinnamon stick in the blender/mixer jar along with sugar and powdered it.Adjust the cinnamon according to your liking as it has a very strong flavor and can be unpleasant if gone overboard.

Tuesday, February 14, 2012

Comin Soon .............

Sponge Cake with Butter cream Icing and Pralines

Marble Cake


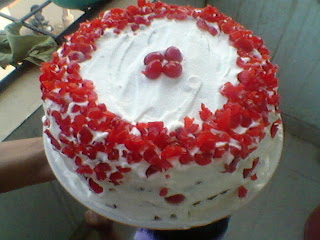
Chocolate cake with Fresh Whipped Cream and Cherries


Crunchy Peanut Buttons


I just LOVE Ria's blog, Ria's Collection.
She has a great collection of recipes in her blog which i am sure all are familiar with after all she is our Vanitha Pachakarani 2011 :).
I have also tried her Biscuit Pudding and that's a keeper for sure....yummmmm .. do check it out.
Super simple to make and super duper tasty!!!
Also what I really liked was her prompt replies to my queries. When I first tried these out it was not a smooth ride and she really helped me lot!!!!! Thank you so much for that
These are my first ever home baked cookies ,so they very special :)

I followed Ria's recipe with just some minor adjustments for the benefit of baby S.
Also used lesser quantity as me n cookies do not have such a good history :D ... but I guess that's changing now...
Next time planning to follow Ria's measurements and maybe store half the dough in the fridge and use when required? Not sure, will post if I ever try that.

Adapted from Ria's Collection

Ingredients:

Wheat flour-1/2 C
Butter -1/2 C (make sure it's at room temperature) or enough to bind the ingredients together
Powdered sugar- 1/2 C
Peanuts ( without the skin) -1/2C -- i roasted them in M/W for around 3 minutes before using them
please excuse the poor picture quality - taken from my phone :(
  • Roughly powder the nuts in a mixie.This makes it crunchier, but as I was making them for the baby i powdered them a little finely.
  • Mix all the ingredients together and form 1/2 lime sized balls and flatten lightly with your hands or with a fork.
  • Place them on an ungreased cookie sheet and bake at 180 degrees for 15 mins.(mine took around 20 mins, will depend on the oven temperatures i guess)
  • They might be soft, but will harden once cooled.
  • Store in airtight tins.
And as she promises these are highly addictive.
Im afraid i will have to bake a fresh batch for my lil one as all the grown up kids(us) are finding it really hard to keep their hands off this :D 
Maybe i will finally find my misplaced camera's connection cable and be able to take decent pictures of them.... Wish me luck.